The Payables and Receivables (or PayRec) module uses the billing cycle file to process and keep track of invoices and payments after claims are adjudicated. Billing cycle files are automatically generated after configuring an entity’s claim and billing cycle setup in the Billing Manager.
To run a receivables or payables batch, you will first need to find and download the relevant billing cycle file, then upload it to the Receivables or Payables Manager.
This guide demonstrates how you can find and download the billing cycle files.
How to Find and Download Billing Cycle Files
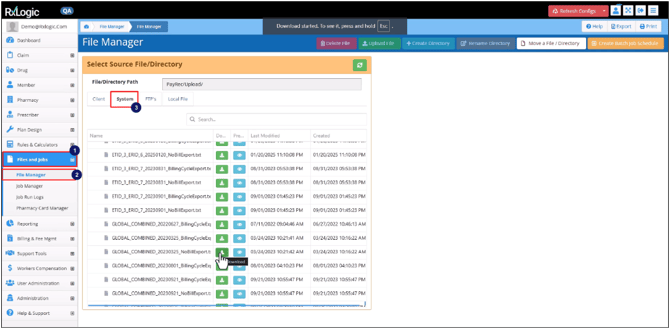
- Click Files and Jobs in the left navigation menu.
- Select File Manager from the dropdown.
- Switch to the System tab in the Select Source File or Directory screen.
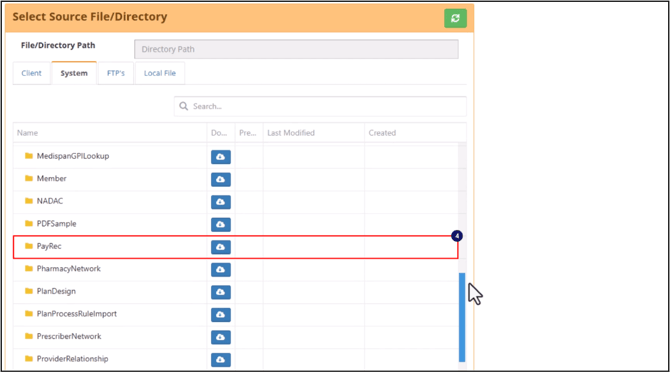
- Scroll through the list and select PayRec folder.
- Scroll to the bottom and select the Upload folder.
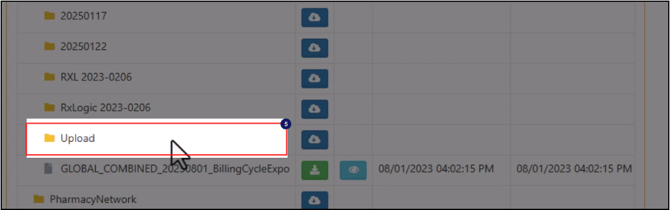 This is where the system stores or exports the billing cycle files it generates.
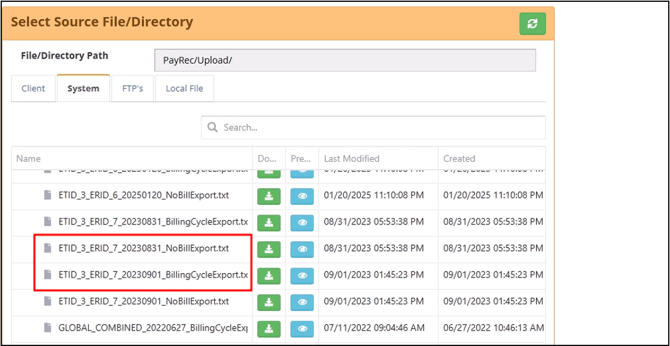
 - Now, scroll through the list to find the relevant global billing cycle export file, which contains the claim and billing details for all entities scheduled to be included in a global billing cycle export job.
The numbers in the middle of the filename indicate the date of the billing cycle export. The first four digits indicate the year, the middle two the month and then the date.
Billing Cycle files with billable claims are labeled with BillingCycleExport at the end of their filename. Files labeled with No BillExport contain non-billable claims.

- After locating the relevant billing cycle file, click on the Download button to save the file locally in the Downloads folder.
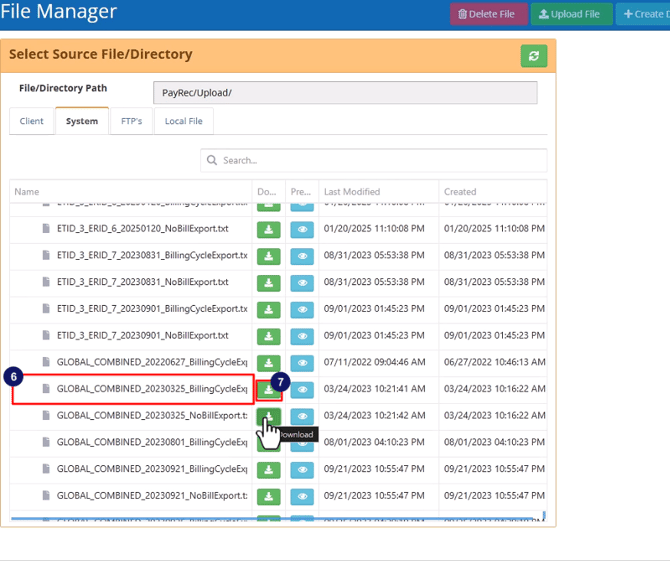
After downloading. You can upload the billing cycle file to the Receivables or Payables Manager to process billing for claims and generate invoice and payment files.
If you have claim and billilng cycles set up to run at the entity level, you will see billing cycle files with names that start with ETID. The number following the ETID indicates the entity’s hierarchy level, 1 represents Groups, 2 represents Carriers and 3 represents Organizations. This is followed by the ERID, which indicates the entity’s unique ID number in the system, then the date.
What would you like to learn about next?