Payables Adjustment Management allows you to modify payments made to a Pay-To entity for a specific pharmacy. Payables Adjustments can be made to either increase or decrease a payments amount. There are currently twenty-four reason codes available for payment adjustments, such as Authorized Return, Rebate, Bonus, Interest Owed, Adjustment and Overpayment Recovery.
Payment adjustments must be entered into PayRec prior to running the batch they are to be applied to.
Ajdustments are applied when running a payables batch for a billing cycle based on the following requirements; the adjustment records status is Open, Active Indicator is set to YES and the Adjustment Date falls within the date range of the batch (batch start date – batch end date).
Open Adjustment Management
To open the Adjustment Management screen located in the Payables Manager.
- Click on the Billing & Fee Mgmt option in the left navigation menu.
- Click Payables Manager from the dropdown list.
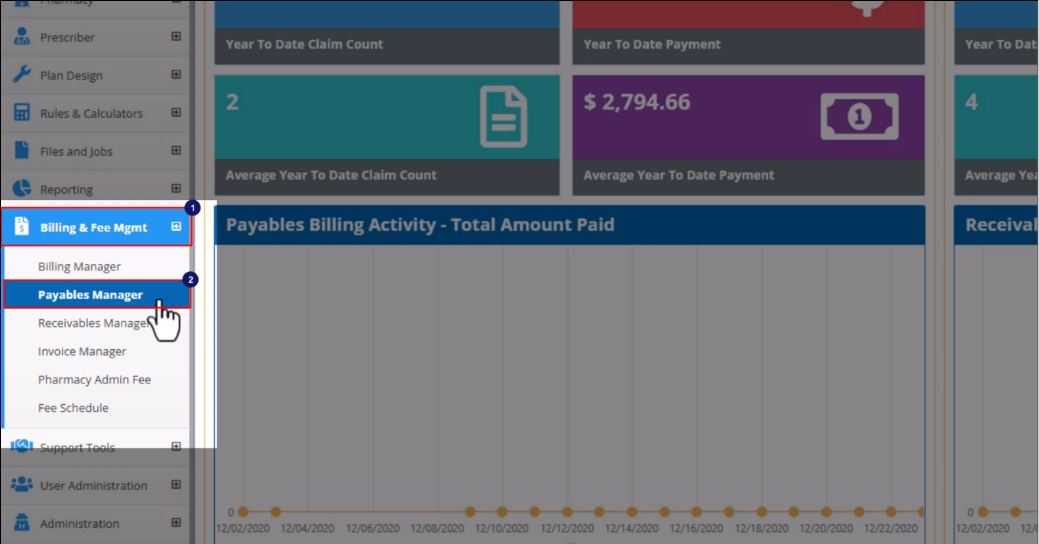
- Click on the Adjustment Mgmt tab.
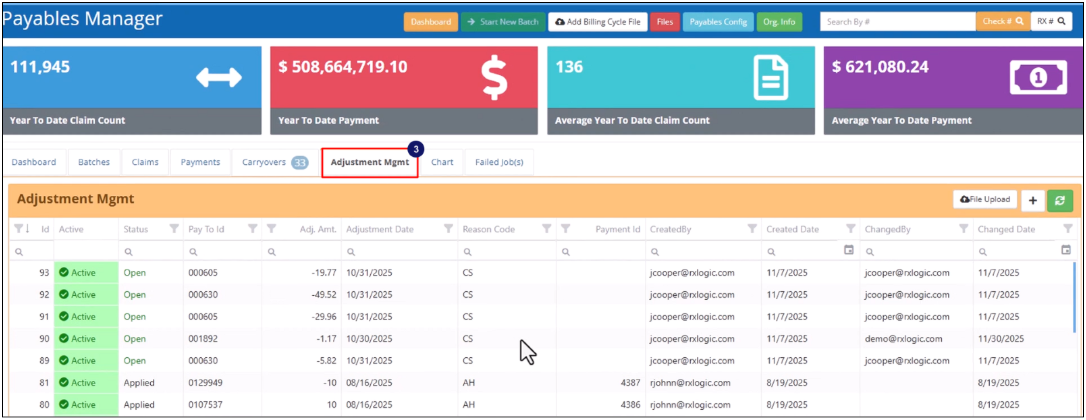
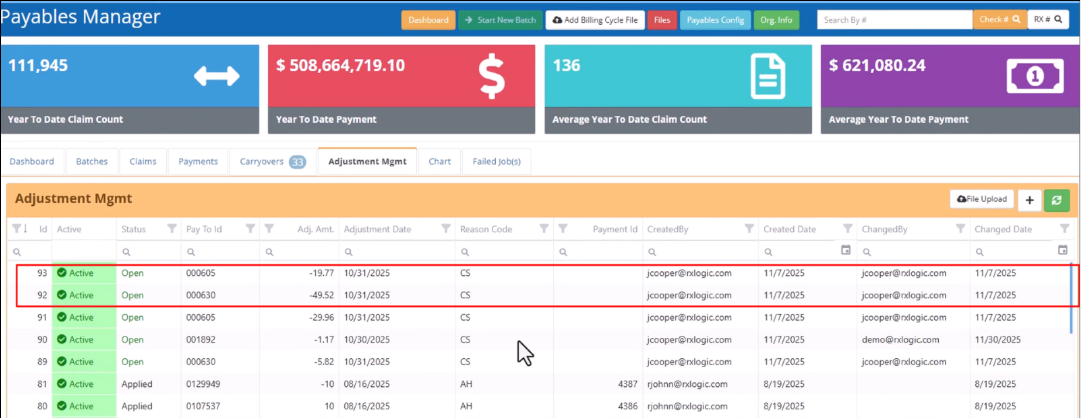
The Adjustment Mgmt Library grid will appear on the screen displaying all existing payment adjustment records.
Adjustment Management Library Overview
Adjustment Mgmt Grid
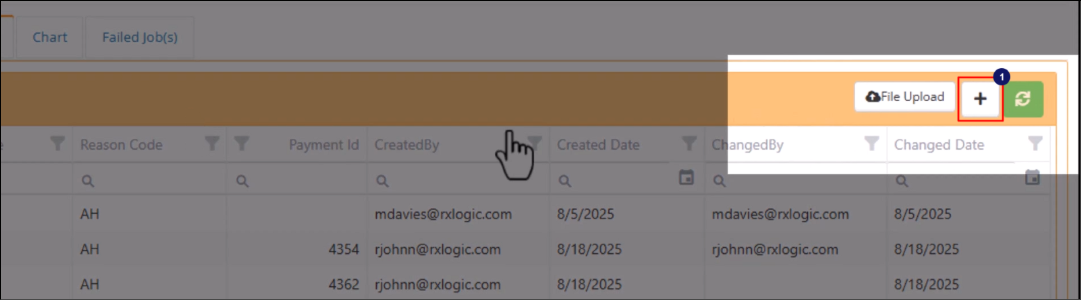
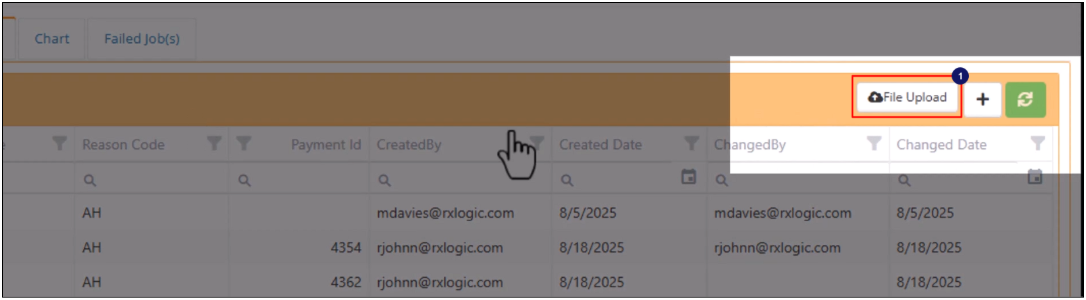
Adjustment Mgmt grid header buttons
File Upload – Opens a file selection window to upload a payment adjustment file.
+ – Opens the Add Payment Adjustment window.
 - Refreshes the Adjustment Mgmt grid
- ID - Shows a payment adjustment’s unique, system-generated ID.
- Active - Shows whether payment adjustment is active or inactive.
If a payment adjustment is active, it will be applied during a payables batch job if its adjustment date falls within the batch job’s billing cycle period.
If it is set to inactive, the adjustment will be bypassed or ignored.
- Status – Shows if adjustment is Open or has been Applied
Adjustments with an Open status can be edited and deleted.
Adjustments with an Applied status cannot be edited or deleted.
- Pay-To ID - Shows the Pay-To ID the payment adjustment applies to.
- Pharmacy NPI – Shows the pharmacy the adjustment is for.
- Adjustment Amount - Shows the payment adjustment amount.
A positive value indicates a reduction in the payment to the pharmacy.
A negative value indicates an increase in the payment to the pharmacy.
- Adjustment Date – Is the date compared to the start and end dates of each batch that is run to determine when the payment adjustment should be applied.
- Reason Code - Shows the reason code selected from the dropdown menu for the adjustment.
- Payment ID - Shows the Payment ID number that the adjustment was applied to. If the adjustment status is still open, the payment ID field will be empty.
- Created By – Shows who created the adjustment.
- Created Date – Shows the date the adjustment was created.
- Changed By – Shows who made the last change to the adjustment record.
- Changed Date – Shows the date the last change was made.
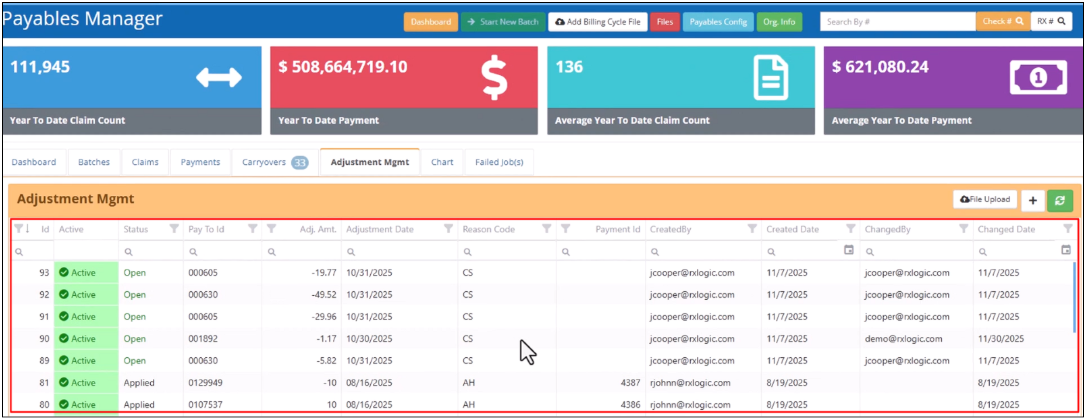
Search, Sort and Filter the Grid
You can sort, filter, and search the library using the column header options at the top of the grid.
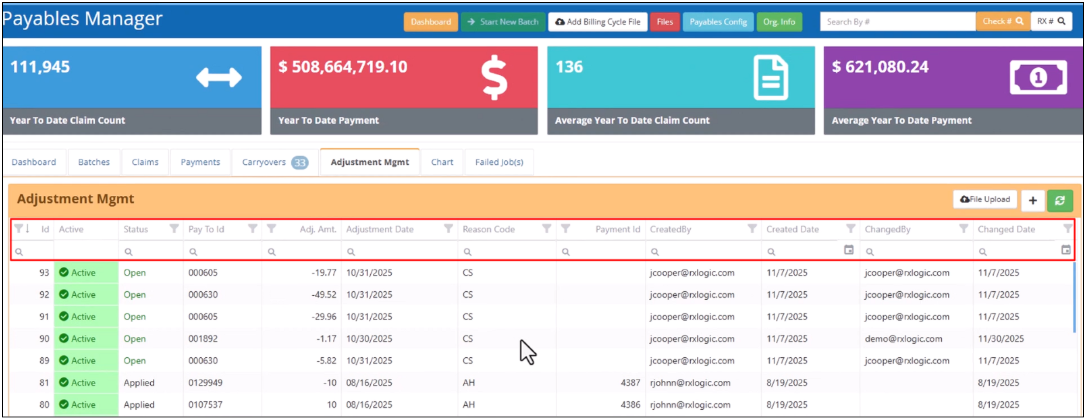
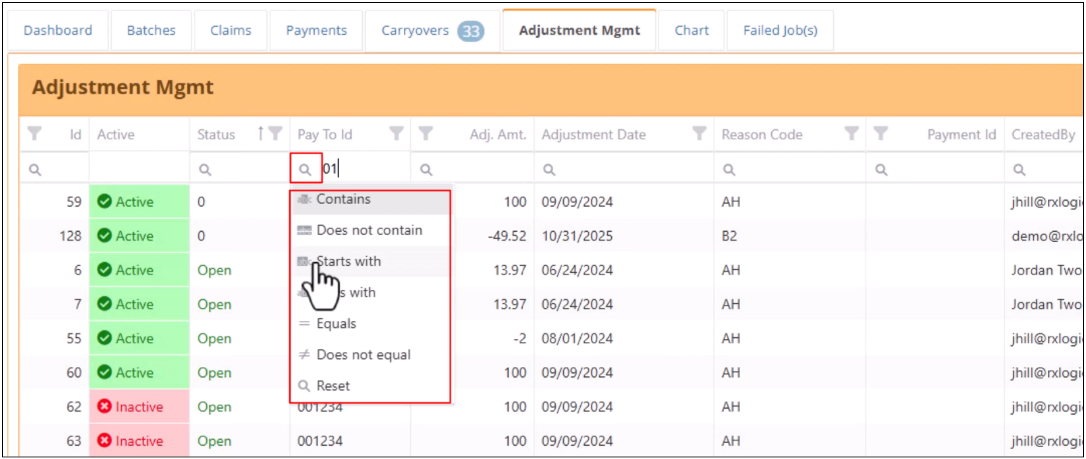
The Magnifying Glass icon to the left of each search field displays a dropdown menu when you hover over it, where you can select a specific search operator for the search field. The highlighted operator on the dropdown menu is the default search operator for that field.
The Filter icon to the right of each column header name that is filterable on, opens a pop-up window where you can select one or more filter options.
Edit or Delete an existing Payment Adjustment
Open Payables Manager
Click on the Adjustment Mgmt tab to open the Adjustment Mgmt library grid.
Use the filtering options on the grid to locate the adjustment you want to edit or delete. Only Open status adjustments can be edited or deleted.
Clicking on an existing adjustment from the grid opens the Update Payment Adjustment window, where you can modify the current configuration for the selected payment or delete it.
To edit a Payment Adjustment Record, enter your changes to the Payment Adjustment Record.
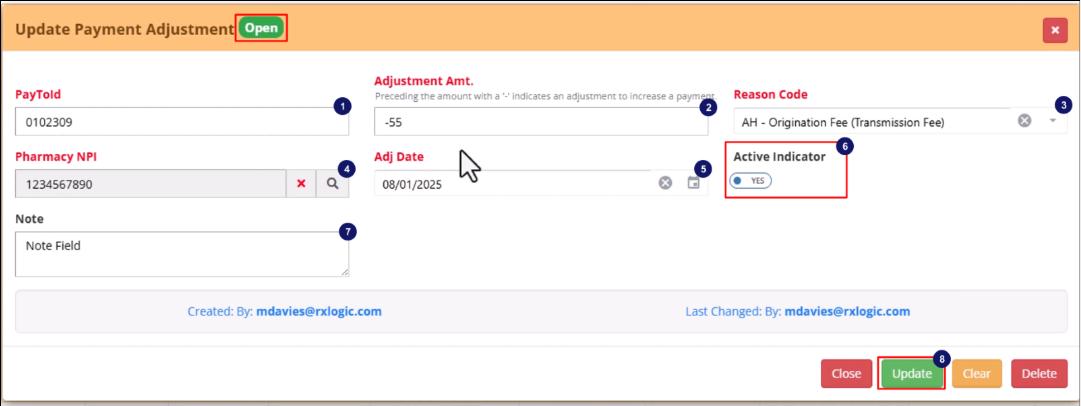
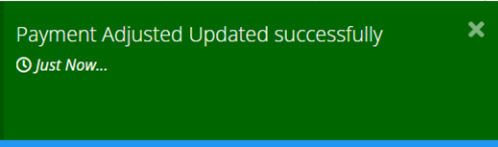
Click on the green Update button to apply the changes you made. A Green Toaster Popup will appear indicating payment was adjusted and updated successfully.
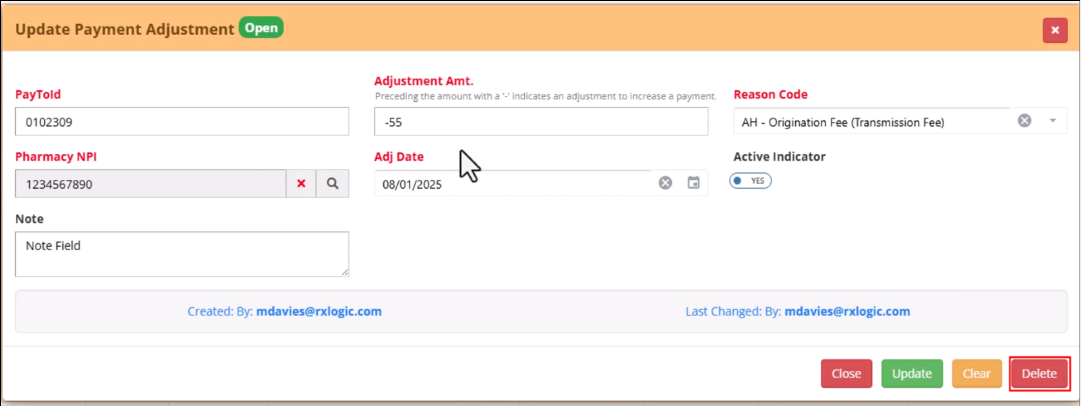
To delete the Payment Record, click on the red Delete button. A Red Toaster Popup will appear requesting confirmation you want to delete the payment adjustment.
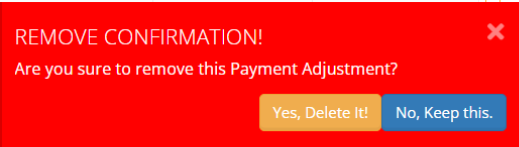
Click the Yes, Delete It! button to delete the payment record and remove it from the Adjustment Mgmt Library.
Click the No, Keep this. button if you do not want to delete the payment adjustment record.
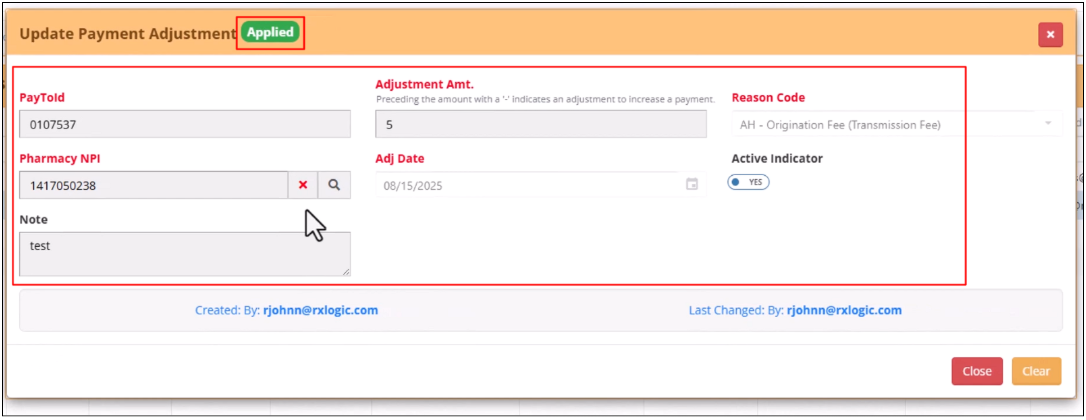
If the selected payment adjustment has already been Applied, it will be indicated in the window’s title bar, and the fields will be greyed out. In such instances, the configuration cannot be changed, and the record cannot be deleted.
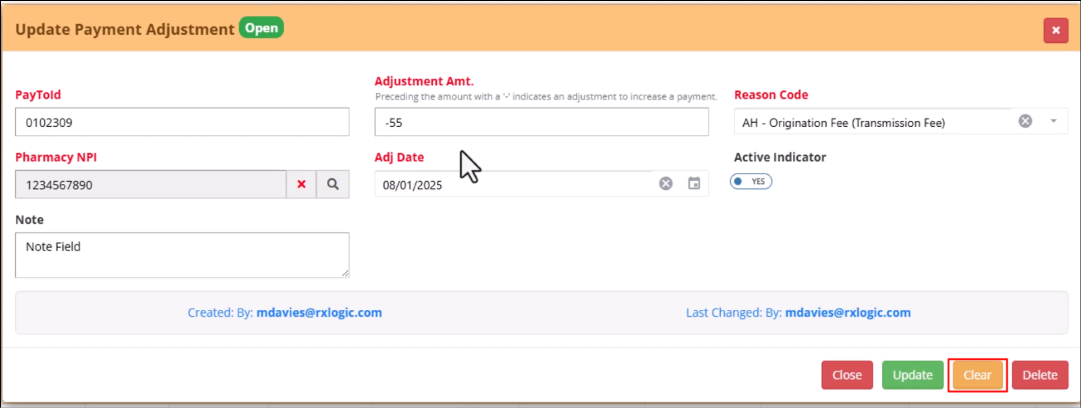
Clicking on the Clear button on the Update Payment Adjustment window closes the Update Payment Adjustment window and opens a new Add Payment Adjustment window.
New Payment Adjustment
Add a New Payment Adjustment Manually
Open Payables Manager
Click on the Adjustment Mgmt tab to open the Adjustment Mgmt library grid.
Click on the Plus (+) button in the right corner of the Adjustment Mgmt header.
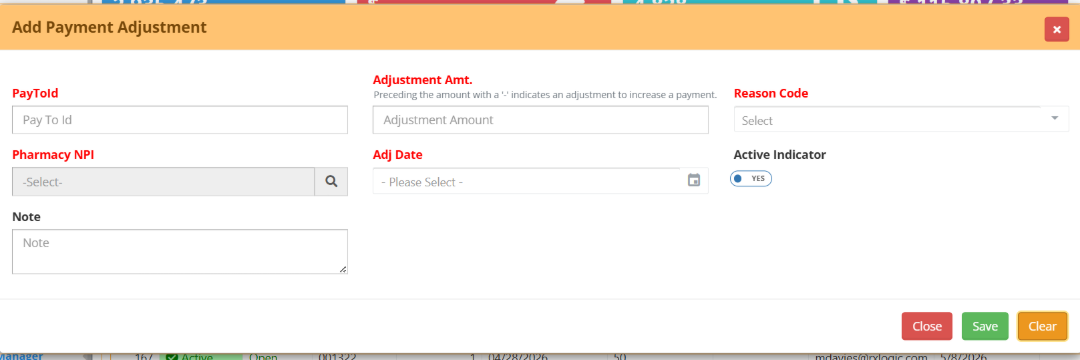
The Add Payment Adjustment window will appear on the screen.
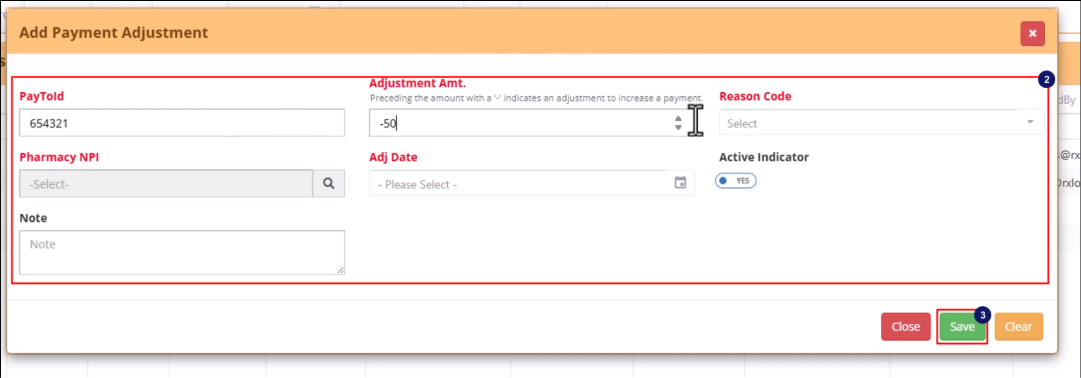
PayToId - Enter the Pay To Id in this field. There are 3 options. Required field.
Payment Center - use Payment Center Id (6 digits)
Self-pay pharmacy - use the pharmacies NCPDP number (7 digits)
Carrier use - the Carrier Code (up to 15 characters)
Pharmacy NPI – Use the Lookup button to open the Pharmacy Library. Use the filtering options to locate the pharmacy you want to create the Payables adjustment for. Click on the Pharmacy Record line in the Pharmacy Library grid to select it. This will close the Pharmacy Library popup window and will populate the Pharmacy NPI field on the Add Payment Adjustment popup window with the Pharmacies NPI number. Required field.
Note – This is a free form field, used to record additional details that relate to the adjustment for future reference. This field is optional.
Adjustment Amt. – Enter the adjustment amount in this field. Required field
To increase the payment to the pharmacy by the adjustment amount, enter a negative sign ‘-‘ in front of the dollar amount. Example: -60.25
To decrease the payment to the pharmacy by the adjustment amount, just enter the dollar amount. Example: 60.25
Adj Date – This date determines if the active open adjustment should be included in the batch being run. To be included in a batch, the date must fall within the batch's start and end date range. Required field
Reason Code – Select a reason for the adjustment from the dropdown menu. Required field
Active Indicator – This defaults to active (toggle set to YES) but can be toggled to NO to make adjustment inactive. When set to inactive, the adjustment is ignored.
Click the green Save button to save the new payment adjustment.
The Adjustment Mgmt library grid will be automatically updated, and a unique ID number will be assigned to the new payment adjustment.
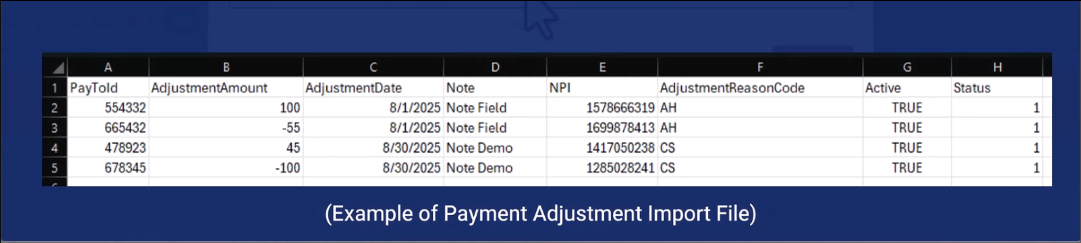
Add New Payment Adjustment(s) Using File
This method allows you to add multiple payment adjustment records at a time.
Create a Payables Adjustments Import file.
Please refer to the RxLogic Payables Adjustments Import File Layout document for more information about the file requirements.
Open Payables Manager.
Click on the Adjustment Mgmt tab to open the Adjustment Mgmt library grid.
Click on the File Upload button.
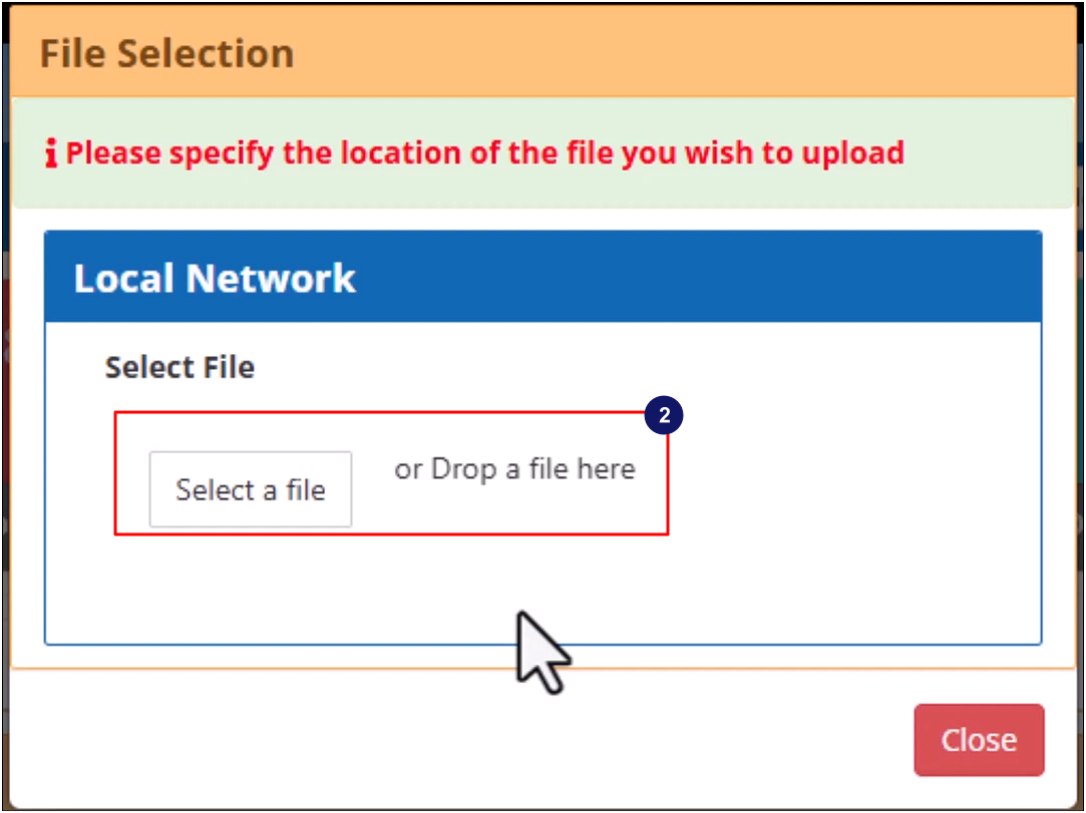
This opens the File Selection box
Click on the Select a file button to select a file or Drag and Drop your file in the File Selection Box.
When the upload is complete, the new payment adjustments will be automatically added to the Adjustment Mgmt library grid.