The RxLogic Organization Manager allows you to create new organization records. In this guide, you will learn how to create an organization.
Create New Organization
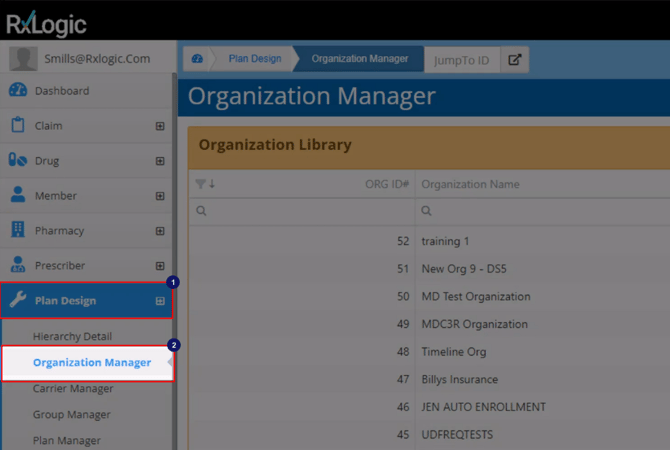
Open the Organization Manager by clicking on the Plan Design in the left navigation menu and selecting Organization Manager from the dropdown.
Click on the Create New button.
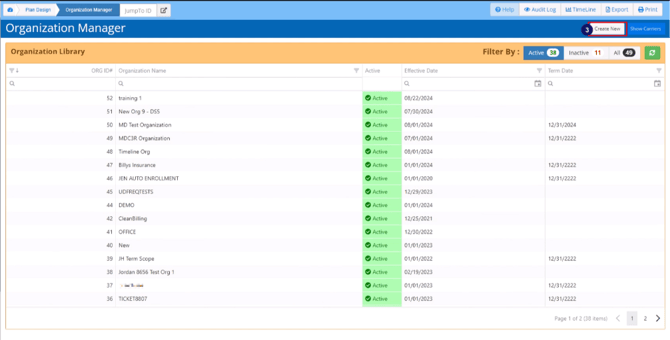
The Create New Organization screen will appear on the screen.
Enter the name of the organization in the Organization Name field. The name of the organization must be unique.
Enter the effective date of the organization in the Effective Date field.
Enter the termination date of the organization in the Termination Date field (Optional).
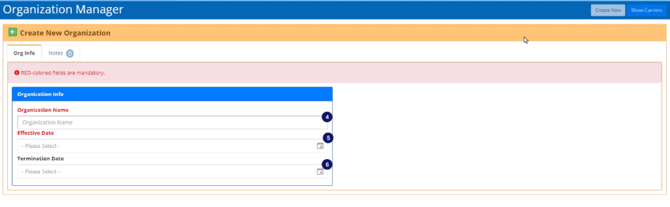
When the termination date is not specified, the organization record will be considered active from the effective date.
Note: You can either enter the dates manually in mm/dd/yyyy format or select a date from the calendar.
Click on the Save button to save the record.
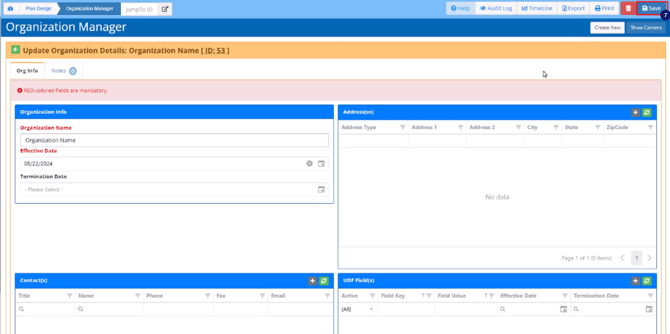
The new Organization Record will be added to the Organization Library.
Add More Details to the Organization Record
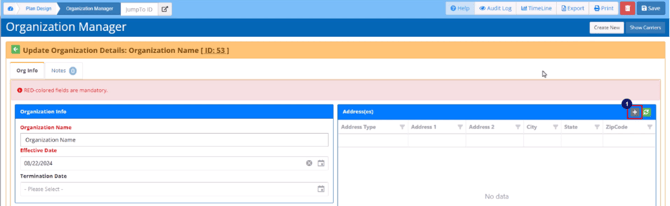
You can add more details to the organization record in the Update Organization Details screen. The Update Organization Detail’s header includes the name of the Organization Record, and the system generated unique ID number for the selected Organization Record. You can open this screen by clicking the newly added record.
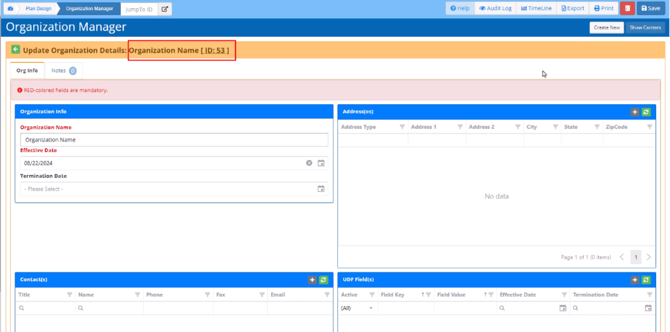
This screen opens in the Organization Info tab, showing additional sections called Contacts, Addresses, and UDF Fields. You can add more information using this screen as follows:
Add New Contact Record
-
Click on the Plus (+) icon in the Contact header.
-
This opens the Add/Edit Contacts screen.
-
Enter the title, name, phone, fax and email in the corresponding fields. All these fields are optional so you can enter as much or as little information as needed.
-
Click on the Add button.
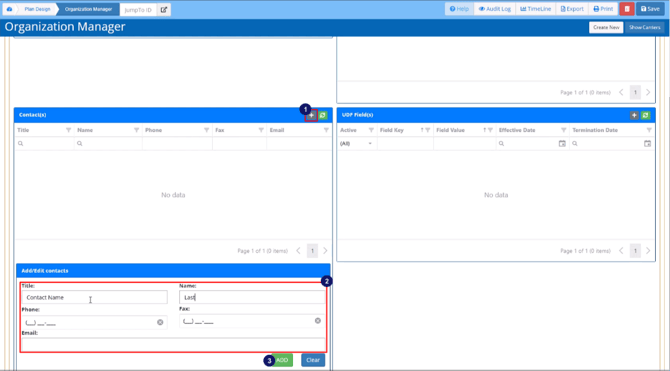
To add additional contacts, follow the above steps.
Add an Address Record
Click on the Plus (+) icon in the upper right corner of the Address header.
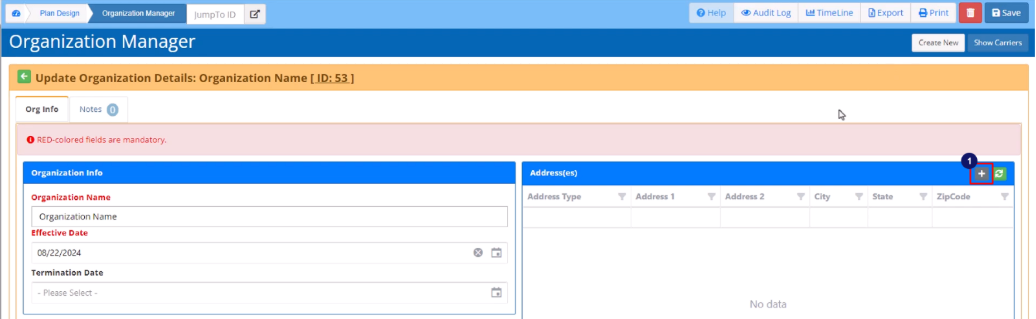
The Add/Edit Address section will appear below.
Select the Address Type from the dropdown.
Select the State from the dropdown menu.
Enter the applicable information in the Address 1, Address 2, City, and Zip Code fields. All these fields are optional, so you can enter as much or as little information as needed.
Click on the Add button.
To add additional addresses, repeat the above steps.
Add User Defined Fields
UDFs are the User-Defined Fields that are created in the UDF Management area of the application specific to a screen.
Click on the Plus (+) icon in the upper right corner of the UDF header.
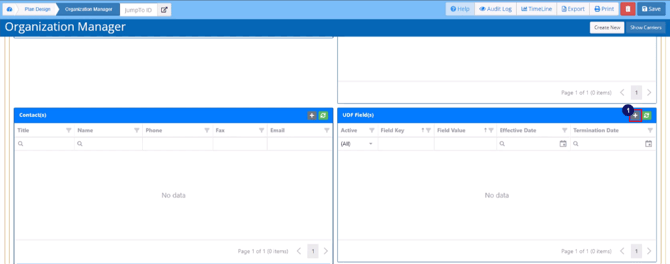
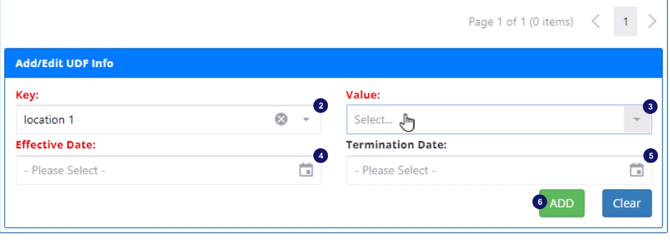
This opens the Add/Edit UDF info section.
Select a UDF Key from the dropdown list.
Enter the value in the Value field that appears beside the Key field. The value type depends upon how the selected key is set up in the UDF Management. The possible options include, free text, numeric only, date or prepopulated.
Enter the effective date in the Effective Date field.
Enter the termination date in the Termination Date field.
Click on the Add button to add the UDF key record.
Repeat the same process to add more UDFs.
Add Notes
To add a note to the Organization Record, follow these steps:
Go to the Notes tab.
Under Add New Note section, enter the note.
Click Save Note.
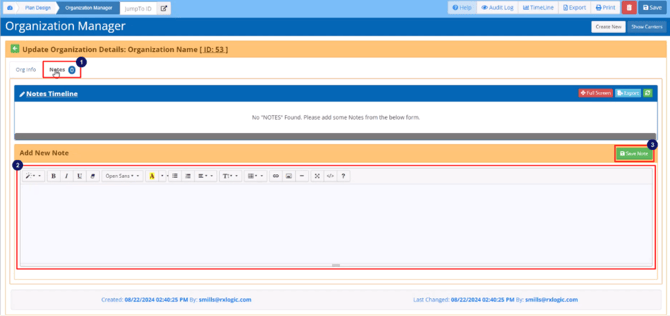
The new note will appear in the Notes Timeline section with a header showing the user who added the note along with the date and time the note was added.
Edit or Remove Notes
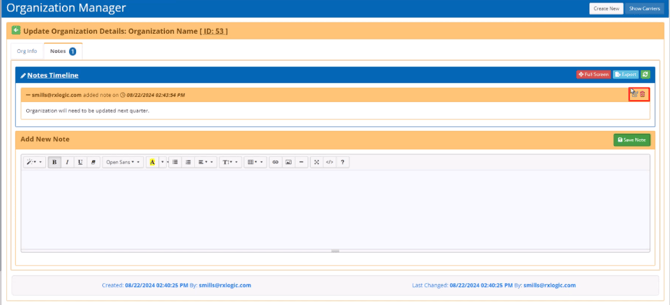
Each note can be edited or deleted if the user has the permissions to do so by using the buttons in the right corner of the individual note header.
View Notes in Full Screen
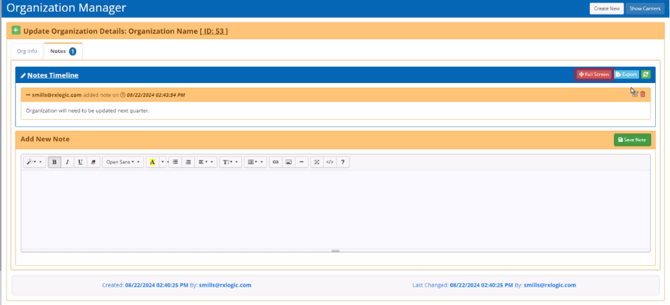
The notes in the Notes Timeline can be viewed in full screen by clicking on the Full Screen button in the right corner of the Notes Timeline header.
Export Notes
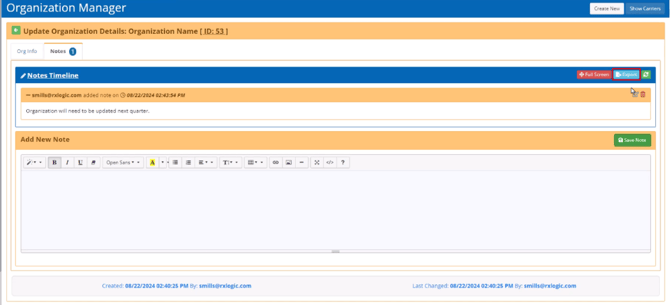
Click on the Export button in the right corner of the Notes Timeline header.
Edit an Existing Organization Record
The ability to add, edit, or delete information in the Organization Manager depends upon the permissions granted to the user. To edit an existing organization record, select the organization record that you want to update from the Organization Library. The Update Organization Details screen will open.
Update Organization Info
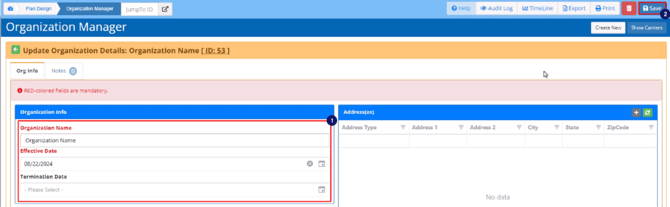
Enter the new information in the Organization Info section.
Click Save to save changes.
Update Contacts, Addresses and UDFs
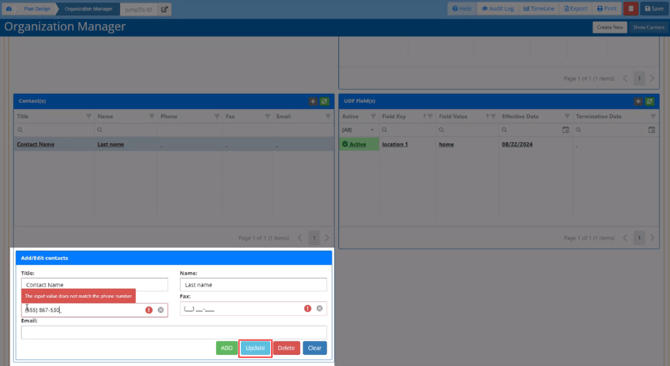
To update contacts, addresses or UDF fields, click on the line of the record to update.
Make the desired changes.
Click Update button to save changes.
Delete Contacts, Addresses or UDFs
To delete contacts, addresses or UDF fields, click on the line of the record to update.
Click on the Delete button in the lower-right corner of the screen.
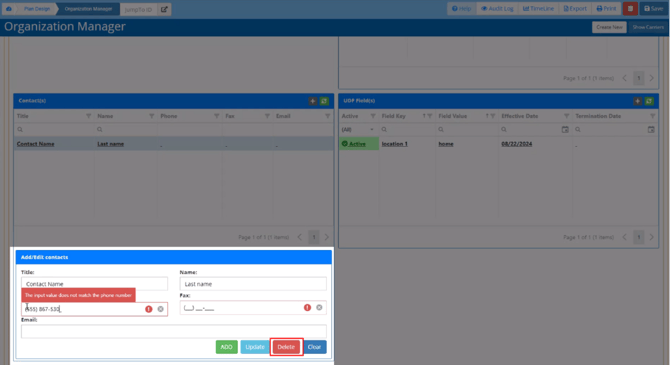
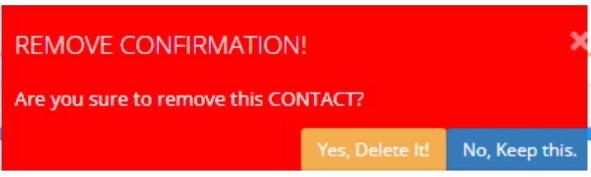
Click Yes to confirm deletion.